Link Ads

More search type here...

March 5, 2023

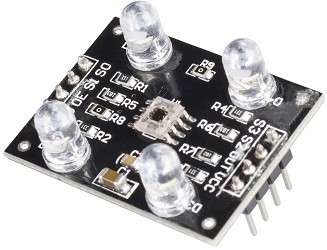
Color sensor calibration TCS 3200

Calibrating a color sensor like the TCS 3200 typically involves a few steps to ensure accurate color readings. Here's a general outline of the calibration process:

  1. Clean the sensor: Before calibrating the sensor, make sure it is free from dust and debris that could affect its readings. Use a clean cloth or compressed air to remove any contaminants from the sensor surface.
  2. Choose a calibration surface: Next, select a surface to use as your calibration target. Ideally, this surface should be a neutral color (e.g. white or gray) and have a matte finish to minimize reflections. You may also want to choose a surface that is representative of the types of colors you'll be measuring with the sensor.
  3. Measure the target: Place the calibration target under the sensor and measure its color using the sensor's built-in LEDs. Record the RGB values for the target color.
  4. Calculate correction factors: Compare the measured RGB values to the expected values for the target color, and calculate correction factors to adjust the sensor's readings. For example, if the sensor consistently reads red as slightly brighter than expected, you could apply a correction factor to decrease the reported red value.
  5. Apply correction factors: Once you have calculated correction factors for each color channel, apply them to the sensor's readings. You may need to adjust the correction factors over time as the sensor's performance changes or you encounter different lighting conditions.

Note that the exact calibration process may vary depending on your specific sensor and application. Be sure to consult the manufacturer's documentation for detailed instructions and recommended best practices.


To calibrate the TCS3200 color sensor, you can follow these steps:

  1. First of all, connect the TCS3200 sensor to the Arduino board and install the basic programming code which will read the colors from the sensor and display them on the serial monitor.
  2. Place the sensor on a white surface, then read the RGB color values on the serial monitor. Make sure the RGB value on white is around (255,255,255). If not, you can adjust the gain value on the sensor to optimize color readability.
  3. After setting the gain, place the sensor on a black surface and read the RGB color values on the serial monitor. Make sure the RGB value on black is around (0,0,0).
  4. After adjusting white and black, you can use other colors for reference such as red, green, blue or other colors. Make sure the resulting RGB value is as expected.
  5. Finally, you can adjust the integration time (INTEG) on the sensor to optimize color rendering. The longer the integration time, the more accurate the color reading results, but the slower the data processing speed. You can try to time the integration from 2,4,8,16, and 32 clock cycles.

Here is an example of basic program code to read RGB values on the TCS3200 color sensor:

#include <Adafruit_TCS3200.h>
Adafruit_TCS3200 colorSensor(TCS3200_S2, TCS3200_S3, TCS3200_OUT);
void setup() {
  Serial.begin(9600);
  colorSensor.begin();
}
void loop() {
  colorSensor.setResolution(TCS3200_18BIT);
  colorSensor.writeRegister(0x00, TCS3200_MEASUREMENT_MODE);
  delay(50);
   uint16_t red = colorSensor.readRed();
  uint16_t green = colorSensor.readGreen();
  uint16_t blue = colorSensor.readBlue();
  Serial.print("RGB: ");
  Serial.print(red);
  Serial.print(" ");
  Serial.print(green);
  Serial.print(" ");
  Serial.println(blue);
}

You can calibrate the sensor by changing the gain and integration time in the following sections:

colorSensor.setGain(TCS3200_GAIN_1X);
colorSensor.setIntegrationTime(TCS3200_INTEGRATIONTIME_2_4MS);
If the color reading results are still not accurate, you can try adjusting the gain and integration time until the resulting RGB values are as expected.


February 6, 2023

Arduino code for play vocal

This code uses the SoftwareSerial library to create a serial communication between the Arduino and a Bluetooth module. The Bluetooth module should be connected to the specified RX and TX pins and set to 9600 baud rate.

Note that this code is just a basic example and may need modifications depending on the specific setup and requirements.

#include <SoftwareSerial.h>
SoftwareSerial mySerial(10, 11); // RX, TX
void setup() {
  mySerial.begin(9600);
  pinMode(9, OUTPUT);
  digitalWrite(9, LOW);
}
void loop() {
  if (mySerial.available()) {
    digitalWrite(9, HIGH);
    mySerial.write(mySerial.read());
  }
}


February 2, 2023

IOT arduino logging data to web server

To log data from an Arduino IoT device to a web server, you can follow these general steps:

  1. Connect the Arduino to the internet, either through Wi-Fi or Ethernet.
  2. Use a library such as the HTTPClient library to make HTTP requests to the server.
  3. Write code to format the data you want to log into a JSON or CSV string.
  4. Send the data as a POST request to a server-side script (e.g. PHP, Python, Node.js) that can receive and store the data in a database.
  5. On the server side, use a database management system such as MySQL or MongoDB to store the data.
  6. Optionally, you can also retrieve the data from the database and display it on a web page.
Here is an example of sending data from an Arduino to a server:

#include <WiFi.h>
#include <HTTPClient.h>

const char* ssid     = "your_SSID";
const char* password = "your_PASSWORD";
const char* serverName = "your_SERVER_IP_ADDRESS";

void setup() {
  WiFi.begin(ssid, password);
  while (WiFi.status() != WL_CONNECTED) {
    delay(1000);
    Serial.println("Connecting to WiFi...");
  }
  Serial.println("Connected to WiFi");
}

void loop() {
  HTTPClient http;
  http.begin("http://" + String(serverName) + "/data");
  http.addHeader("Content-Type", "application/json");
  int httpResponseCode = http.POST("{\"value\":\"" + String(analogRead(A0)) + "\"}");
  String response = http.getString();
  Serial.println(httpResponseCode);
  Serial.println(response);
  http.end();
  delay(10000);
}

Here some example to temperature logging by LM35 temperature sensor:


Here is an example of how you could log temperature data from an LM35 temperature sensor connected to an Arduino to a web server:

#include <WiFi.h>
#include <HTTPClient.h>

const char* ssid     = "your_SSID";
const char* password = "your_PASSWORD";
const char* serverName = "your_SERVER_IP_ADDRESS";
const int temperaturePin = A0;

void setup() {
  WiFi.begin(ssid, password);
  while (WiFi.status() != WL_CONNECTED) {
    delay(1000);
    Serial.println("Connecting to WiFi...");
  }
  Serial.println("Connected to WiFi");
  pinMode(temperaturePin, INPUT);
}

void loop() {
  int reading = analogRead(temperaturePin);
  float voltage = reading * 5.0 / 1024;
  float temperature = (voltage - 0.5) * 100;

  HTTPClient http;
  http.begin("http://" + String(serverName) + "/data");
  http.addHeader("Content-Type", "application/json");
  int httpResponseCode = http.POST("{\"temperature\":\"" + String(temperature) + "\"}");
  String response = http.getString();
  Serial.println(httpResponseCode);
  Serial.println(response);
  http.end();
  delay(10000);
}

This code connects to a Wi-Fi network using the WiFi.begin method and waits until the connection is established. The pinMode method is used to set the pin connected to the LM35 to INPUT mode. In the loop function, the code reads the analog value from the LM35, converts it to a temperature value, and then sends a POST request to the server containing the temperature data in JSON format. The server's response is printed to the serial monitor for debugging purposes.


Here is an example of how you could log temperature data from an LM35 temperature sensor connected to an Arduino to the Blynk cloud platform:


#include <WiFi.h>
#include <BlynkSimpleEsp32.h>

char auth[] = "your_BLYNK_AUTH_TOKEN";
char ssid[] = "your_SSID";
char pass[] = "your_PASSWORD";

const int temperaturePin = A0;

void setup() {
  WiFi.begin(ssid, pass);
  while (WiFi.status() != WL_CONNECTED) {
    delay(1000);
    Serial.println("Connecting to WiFi...");
  }
  Serial.println("Connected to WiFi");
  Blynk.begin(auth, ssid, pass);
  pinMode(temperaturePin, INPUT);
}

void loop() {
  int reading = analogRead(temperaturePin);
  float voltage = reading * 5.0 / 1024;
  float temperature = (voltage - 0.5) * 100;

  Blynk.virtualWrite(V0, temperature);
  delay(1000);
}


This code connects to a Wi-Fi network using the WiFi.begin method and waits until the connection is established. The Blynk.begin method is used to initialize the Blynk library with the auth token and the Wi-Fi credentials. The pinMode method is used to set the pin connected to the LM35 to INPUT mode. In the loop function, the code reads the analog value from the LM35, converts it to a temperature value, and then sends the temperature data to Blynk's virtual pin 0 using the Blynk.virtualWrite method. The data can be displayed in a Blynk app using various widgets such as a gauge or a chart.