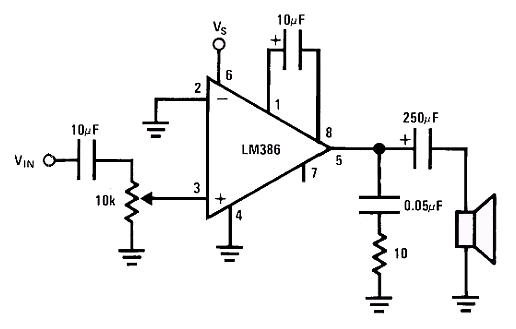
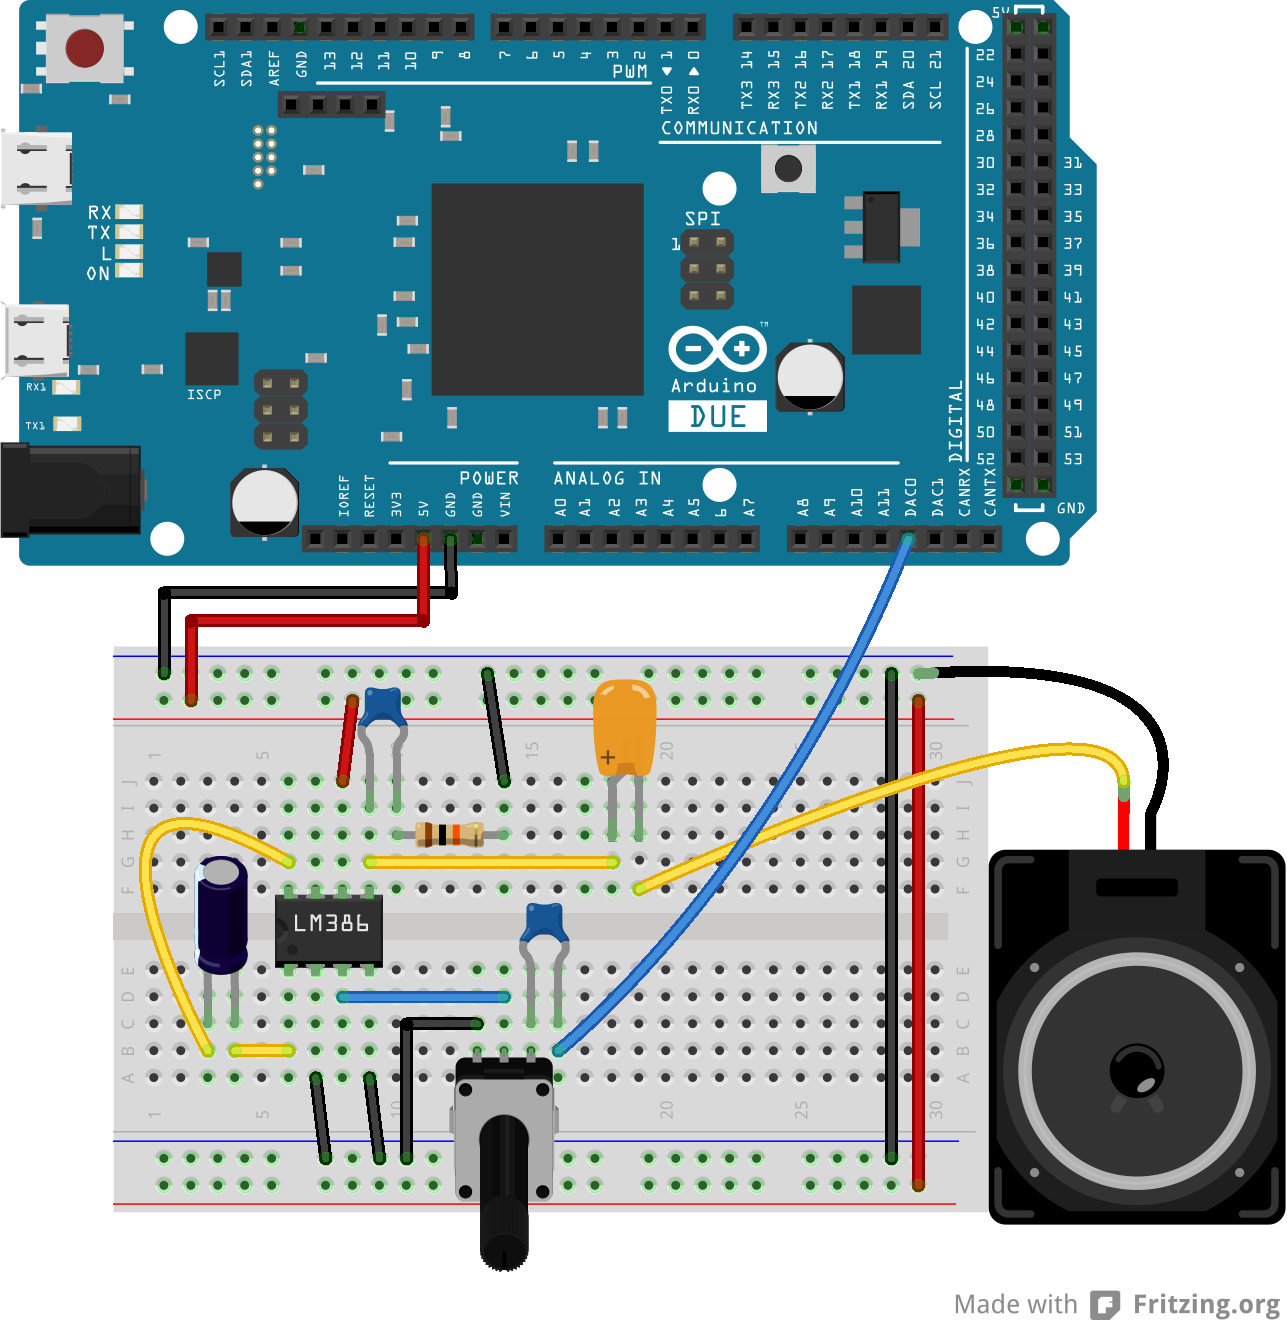
Hardware Required
- Arduino Due Board
- 8-ohm speaker or headphones
- Arduino shield with an SD card with cs CS 4 (like the Ethernet shield)
- LM386 (low power audio amplifier)
- 10 kohm potentiometer
- 10 ohm resistor
- 2 x 10 µF capacitor
- 0.05 µF (or 0.1 µF) capacitor
- 250 µF capacitor
File Audio File
File audio disimpam di SD card format file .wav misal diberi nama (test .wav) frek sampling 44100 Hz, 16-bit stereo quality.Code Program:
/*
Simple Audio Player
Demonstrates the use of the Audio library for the Arduino Due
Hardware required :
* Arduino shield with a SD card on CS4
* A sound file named "test.wav" in the root directory of the SD card
* An audio amplifier to connect to the DAC0 and ground
* A speaker to connect to the audio amplifier
Original by Massimo Banzi September 20, 2012
Modified by Scott Fitzgerald October 19, 2012
Modified by Arturo Guadalupi December 18, 2015
This example code is in the public domain
http://www.arduino.cc/en/Tutorial/SimpleAudioPlayer
*/
#include <SD.h>
#include <SPI.h>
#include <Audio.h>
void setup() {
// debug output at 9600 baud
Serial.begin(9600);
// setup SD-card
Serial.print("Initializing SD card...");
if (!SD.begin(4)) {
Serial.println(" failed!");
while(true);
}
Serial.println(" done.");
// hi-speed SPI transfers
// 44100kHz stereo => 88200 sample rate
// 100 mSec of prebuffering.
Audio.begin(88200, 100);
}
void loop() {
int count = 0;
// open wave file from sdcard
File myFile = SD.open("test.wav");
if (!myFile) {
// if the file didn't open, print an error and stop
Serial.println("error opening test.wav");
while (true);
}
const int S = 1024; // Number of samples to read in block
short buffer[S];
Serial.print("Playing");
// until the file is not finished
while (myFile.available()) {
// read from the file into buffer
myFile.read(buffer, sizeof(buffer));
// Prepare samples
int volume = 1024;
Audio.prepare(buffer, S, volume);
// Feed samples to audio
Audio.write(buffer, S);
// Every 100 block print a '.'
count++;
if (count == 100) {
Serial.print(".");
count = 0;
}
}
myFile.close();
Serial.println("End of file. Thank you for listening!");
while (true) ;
}


No comments:
Post a Comment